Oven Toastered Chicken. The simplest cooking method.

Picture

OVEN TOASTERED CHICKEN
Another simple cooking approach.
Again, as my usual prelude, pardon for not using “volumetric” approach in cooking
like by teaspoons, tablespoons, cups or the like.
I prefer “by weight” system that gives “approximately uniform” results
every time I do them.
This system also prepares you to the “commercial formulation” of each and every recipe I post.
INGREDIENTS:
1 kilo whole cleaned, innards removed, chicken
MARINADE:
500 ml. tap water
100 ml. Sprite or 7-Up
10 ml. cane vinegar
5 grams salt
2 grams MSG (optional)
MEAT RUB:
3 grams cracked black pepper
3 grams dried thyme
2 grams nutmeg powder
2 grams coriander powder
2 grams Spanish paprika powder
3 grams garlic powder
3 grams onion powder
COOKING NEEDS:
Oven toaster with rotisseri
Oven toaster skewer
Stainless wire or thick tying thread
Meat thermometer
PROCEDURES:
1.    Combine all ingredients of marinade. Tumble well to dissolve solids.
2.    In ref or chiller (NOT FREEZER), marinate chicken overnight.
3.    With little massaging, tumble every 6 hours to effect full flavor absorption.
4.    Mix all ingredients of meat rub. Toss and tumble well for optimum blend.
5.    Without overly draining, coat chicken thoroughly with meat rub
covering all parts-outside and inside.
6.    Screw on chicken unto skewer. Tighten and secure well as chicken will be cooked while rotating.
If need be, use stainless steel wires or thick thread to fasten legs well unto skewer.
Wedge skewer unto rotisserie slots.
Set to lowest temperature and cooking time first.
Test if rotating.

7.    Check if heating rods up & down are ON.
8.    All ok, re-set oven toaster to 170-175 deg. C (338-347 deg. F).
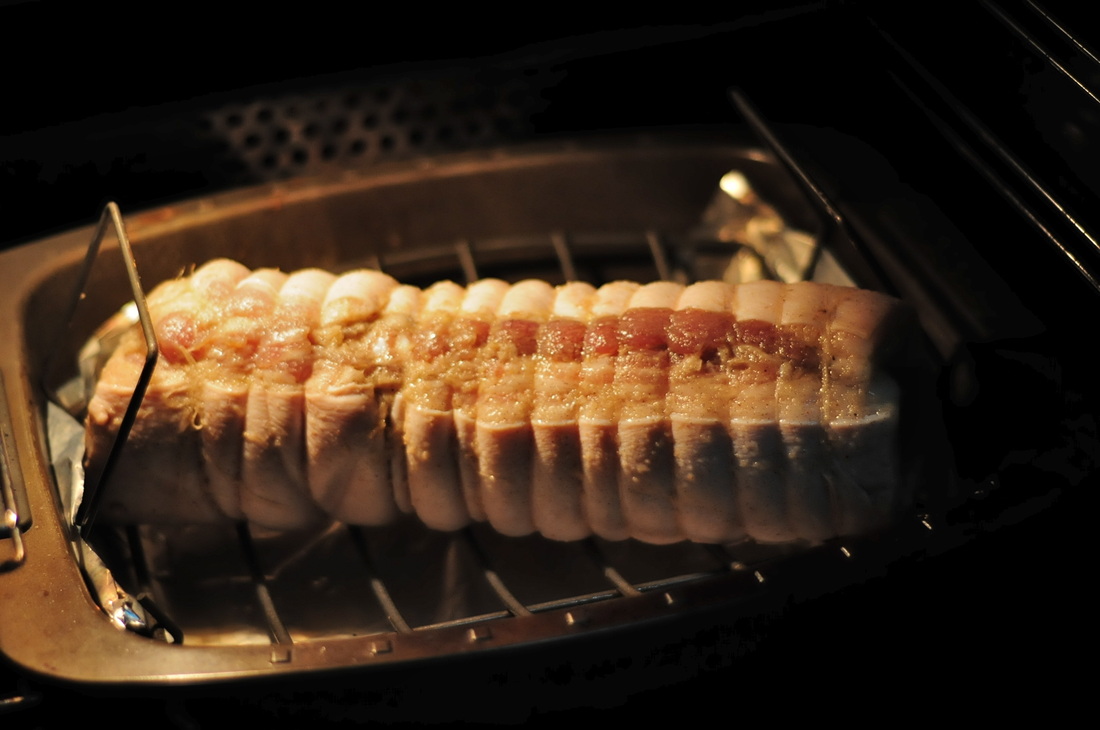
9.    Roast/toaster for 45 minutes
OR until internal temperature of chicken on its middle part of legs
(where blood is usually evident ) is 85 deg. C
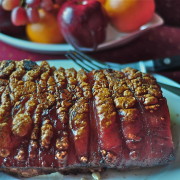
10.  Once desired INTERNAL temp is reached, DONE.
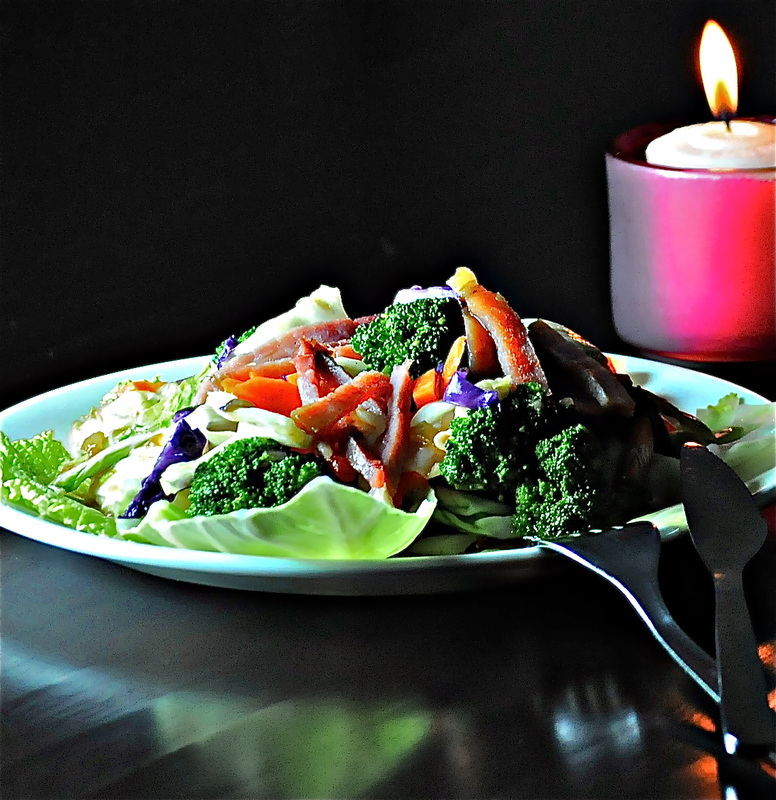
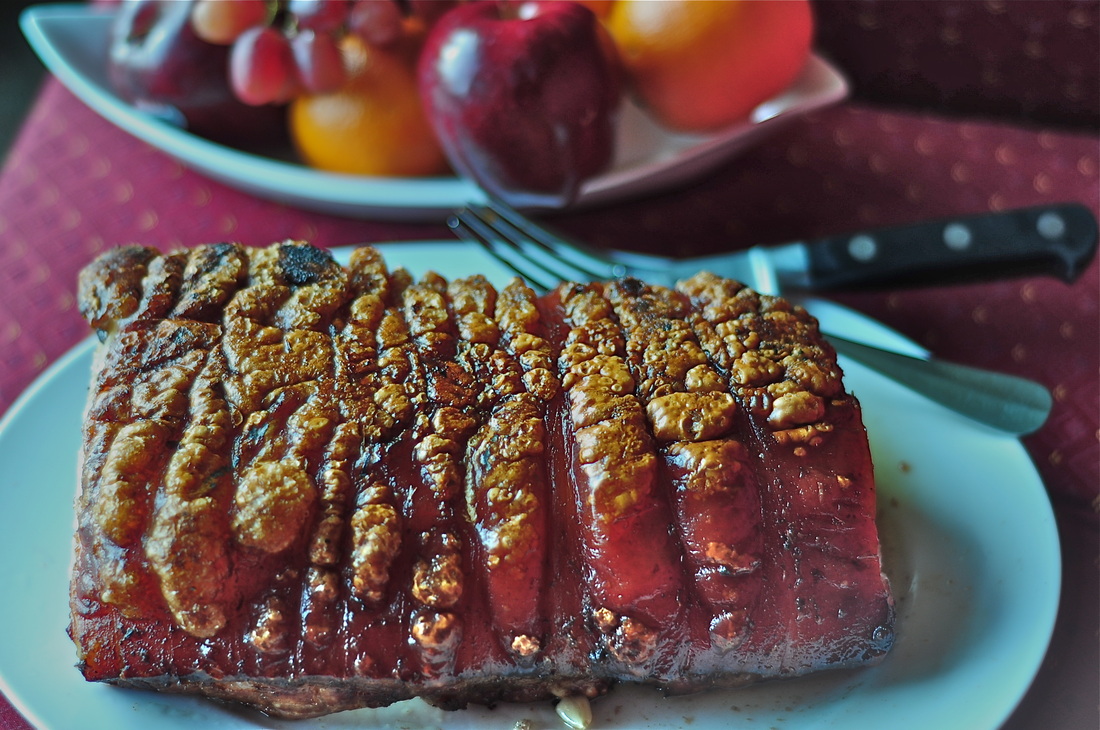
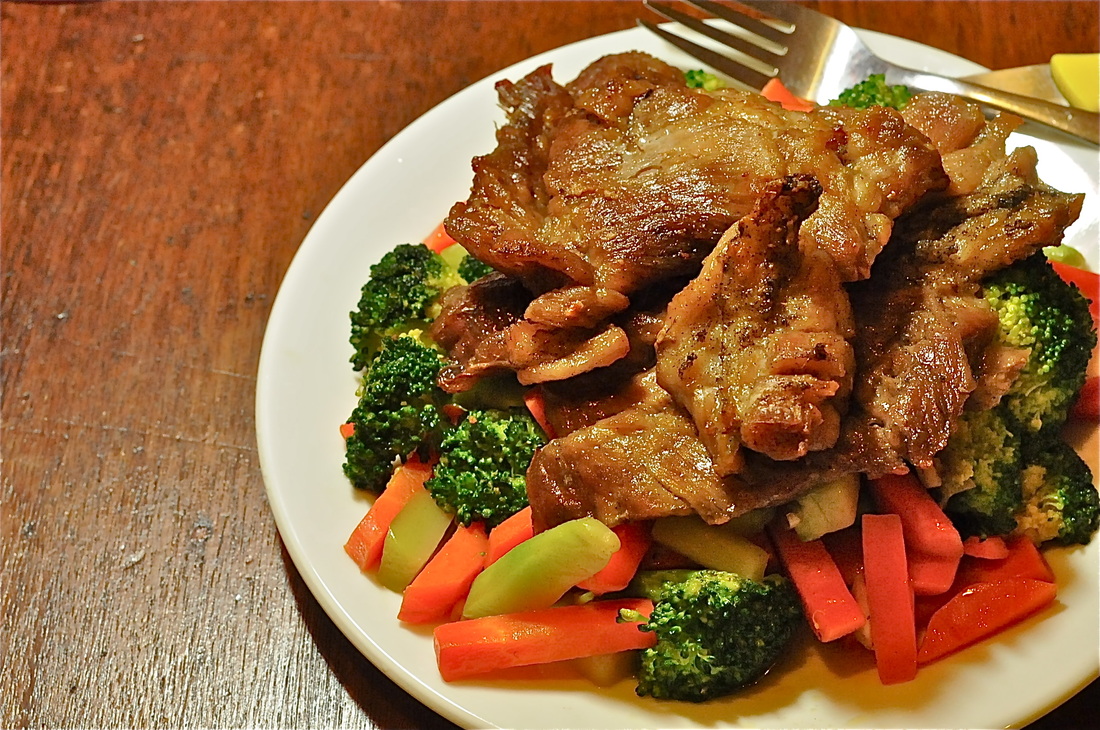
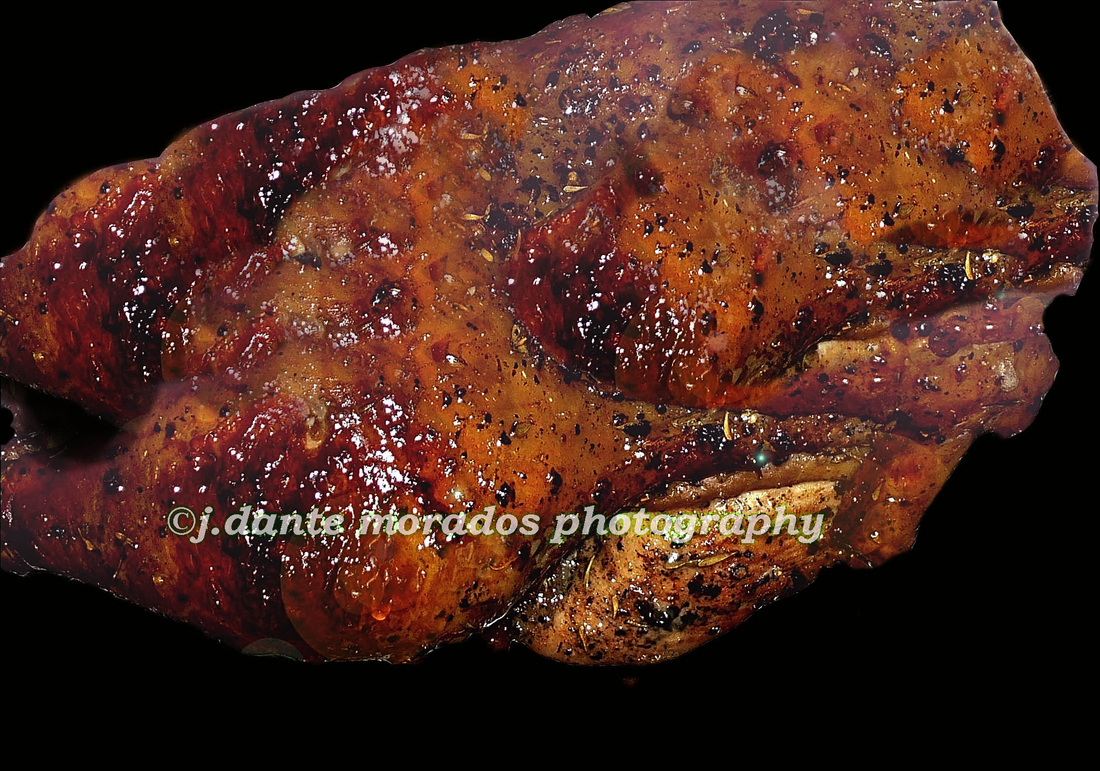
Be glad to have a toastered chicken
with light to dark brown skin outside, ultra aromatic,
juiciest poultry with zero blood coagulation inside that you’ve ever cooked.
CAREFUL. TOASTER IS HOT.
ENJOY.

Gramp’s Salad. (…just a term. Also designed for young ones)

Picture

GRAMP’S SALAD
Constantly communicating and exchanging ideas
on just right & proper ingredients’ usages
to Chef Ma, a culinary professor, down mid part of archipelago, in Visayas.
Had given her some recommendations on the kinds of
ingredients, food grade chemicals & preservatives to be used in:
sauces, cooked canned Filipino per-serve recipes and bottled-flavored iced teas.
An extra perk, in exchange for my recommendations,
she developed a “super easy & quick to prepare veggies salad”
dedicating the apt nomenclature to me:
“GRAMP’s SALAD”
Simple as they are, I adjusted some ingredients,
removed un-needed ones and introduced “quick blanching” into veggies.
“Quick boiling water blanching” does not take away crispness,
it, in fact, retains, & enhances the green color of veggies
while acting as “bactericidal” medium (killing bacteria)
that may be present in raw ones as amoeba.
Thus, “amoebiasis”, in big essence, is prevented.
And I was excited to take snaps of it…so here:
INGREDIENTS:
1.    8-10 pieces of processed meat product you wish.
Slice into strips and fry to your desired done-ness. Set aside.
2.    1 medium broccoli (stalks included) cut to bite size
3. 4-6 leaves of sliced lavander cabbage
4. 4-6 whole leaves of green cabbage – 2 to serve as “bed” & 2 sliced
5. 4 whole leaves of lettuce (any type) – 2 also to serve as “bed” & 2 sliced
6. 1 small carrot – julienned
7. 2 cloves crushed garlic
8. 5ml. EVOO (Extra Virgin Olive Oil)
9. 20 grams oyster sauce
10. 5 grams salt
11.2 grams black pepper
12. 15 ml. tap water for dressing
13. 250 ml. tap water for blanching
PROCEDURES:

1). Saute crushed garlic in heated EVOO.
2). Pour in 5ml. tap water & oyster sauce.
Toss. Simmer. Set aside.
3). In a pan pour in 250 ml. water. Add 1/2 of salt. Boil.
4). In strainer gather all veggies and
blanch in boiling water for just 1 minute.
5). Create “bed” of blanched whole veggie leaves in plate.
6). Pour on top sliced vegetables.
7). Top with fried meat strips.
8). Dress with simmered oyster sauce.
9. Again & again, best enjoyed with loved one.And so, beside lightly lit candle, pairing red or white wine,
your night will spell a very healthy simple dinner.
Not filling.
But satisfying.
Utterly memorable.

LIEMP-CHON (Lechon Liempo)

Picture

The craving for Cebu Lechon
(roasted pig from Cebu-a Visayas region in mid Philippines)
either flown in direct or approximated in Manila, is slowly getting into a fad.
An overly salty, garlic-ky  & Filipino lemon grass abundant marinade
gives the product a different twist.
Via charcoal or open fire it is roasted for 3-5 hours.
Consumers dip bite size delicacies into plain or garlic-laden vinegar.
The craze is my inspiration but I added a kick to it.
Made it simple, oven roasted and tastiest.
INGREDIENTS & COOKING NEEDS:
2 kilos of fully cleaned skin-on, rectangular pork belly (“liempo”)
1 piece large garlic bulb, de-skinned, pounded
1 large white or red onion, quartered
3 pieces cut into 2 inches “tanglad” (Filipino lemongrass)
25 grams fine salt
5 grams ground black pepper
10ml. soy sauce
15 ml. EVOO
thick thread for tying
meat thermometer
PROCEDURES:
1.    Score and slit lean, skin & fat parts of the belly.
2.    Pour in all ingredients unto blender and blend/mix until paste.
3.    Rub inside slits and all parts of meat plus the inside
to effect full flavor absorption.
4.    With left over marinade, lay flat belly (lean part side down)
and marinate for 2 hours inside ref. (DO NOT FREEZE)
5.    Tumble and turn every 30 minutes.
6.    Pouring all marinade left over inside the meat, roll and tie as in picture.
7.    Pour tap water 1/2 of pan.
This will serve as moisturizer to heated meat and as dripping medium.
8.    Pre-heat oven to 350 deg.F then, on top of pan (in a wire rack)
sear belly for 30 minutes.
9.    Lower temp to 250 deg.F and cook further for 1 more hour & 30 minutes
(or longer as you wish-adding water to pan as need be)
until internal temp reaches 140 deg. F for medium rare,
150 deg. F for medium,
155 deg. F for medium well
& 160-165 deg. F for well done.
But fate has not been kind in this instance of  my cooking endevour…
the string got burned and loosen off midway.
Thereby…I got crackling skin (like Chicharon), crispy reddish-brown rind
resembling that of a real charcoal-cooked Lechon
AND a very tasty, juicy and ultra tender inside.
10. Serve.
Best with “suka’t bawang” (garlic-vinegar dip)

Picture

(Resto Review) My expectation failed me…tremendously. Never to shell out a cent…again. 

Picture

A little break from issuing out recipes, please allow me to express my feelings
re this “vaunted” Wagyu serving resto.
With Pangs, fetched my daughter, Cha,
last Sunday where she and her Mom heard mass
while I engaged in my usual  weekend exercise.
Breakfast at her unit or out usually follows our activity.
That bright sunny day, she thought of having us taste and analyze
dishes of this site.
My expectations failed me again...tremendously.
My D300 was ready but did not bother to take out from the bag and snap. Useless.
So, below pictures are those of our products. Not theirs.

Picture

Should corned beef be “slab type”, this must be the color. Not brown due to wanton addition of
“no-brainer spices and herbs that hands of whosoever thought of it can get a hold of”.
OR

Picture

be like this, if “shredded type”.
The one served to me had “out of this world concoction”.
It was “sour-ish, bland, added with rosemary or fennel, I believe”.
Acidity was overpowering.
Announcing to the world that you serve “wagyu”,
then just lightly fry it for patrons to savour and enjoy what you’re rallying about.
The most that you can concoct on a shredded corned beef is to make it into a hash
that is adding cubes of potatoes. Saute or fry with very little spices (hint of garlic and onion).
YOU DO NOT HIDE THE BEAUTY & TASTE OF YOUR HOME-MADE CORNED BEEF.
Let the beefy-ness of your “wagyu” come out.Now the TAPA
(salted, dried or boiled a bit strips of beef)

Picture

Unlike the one above, which is processed from just plain U.S. cattle,
Their “Tapa” is “acidic, with again full of un-wanted flavor of different additions”…and so blackish.The SAUSAGE?

Picture

As if marinated in vinegar, that is aside form “mashy texture of the flesh”
that could be due to “double grinding” instead of using a silent cutter or a bowl chopper.
WHY?
Oh no.
Kindly read my disclaimer below.
Am not here to put that resto down.
With those “costly” meals, please don’t serve us with ” blind-foldedly prepared recipes”.
No “WAGYU” that I’ve tasted of.
Just improve.Another technological recipe coming out next post.

Oven Toastered Pork Loin

Picture

OVEN TOASTERED PORK LOIN
Being just 2 at home, each time Pangs (wife Marilyn) and I get up,
after a short pm nap, in time to prepare for Sunday dinner,
we normally raid the ref.
As always, meat, veggies or fish, excess or left overs from
plant’s trials/production will we find.
This time found a bit big slice of pork loin.
As I usually hate prepping the range or lighting up fire via gas oven,
I normally summon other ways of cooking my food…which,
often, I will land using the ever helpful:
SMALL OVEN TOASTER.
That’s it.  Let’s get this meat ready to meet our tummy.

INGREDIENTS:
Meat:

1/2 kilo pork loin thinly sliced about ¼ inch
Meat Rub:
2 grams ground black pepper
1 gram chili powder
1 gram paprika powder
3 grams garlic powder
2 grams nutmeg powder
2 grams coriander powder
2 grams fine salt
10 ml. EVOO (Extra Virgin Olive Oil)
Veggies:
1 piece small carrot, de-rinded, cut into strips
1 small “sayote”, de-rinded, stripped
1 small head of broccoli, de-stemed,  quartered
2 grams fine salt
1 gram ground black pepper
1 slice butter (any brand of about 2 x 2 x 3 inches)
DIRECTIONS:
1. Except for EVOO & ½ of salt, combine all ingredients for meat rub. Blend well.
2. Rub meat well with EVOO covering all sides.
3. Sprinkle to all sides the meat rub. Toss and tumble to coat all.
4. Set toaster temp to high. Turn on top and bottom heating rods until fiery red.
5. In suitable rack or toaster’s flat bed container,  “BROAST” meat
for 15-20 minutes each side. (this depends on your done-ness preference)
6. Out. Sprinkle with other ½ of salt. Set aside. Cover with foil.
7. After quick boiling water blanching (about 2 minutes),
make bed of different colorful veggies.
8. Season with the little slice of butter on top, sprinkle salt & pepper.
9. Add in your “TOASTERED PORK LOIN”
10. Share with your loved one(s). Enjoy.NOTE: And why did I add salt at last stage which was after cooking?
When you add salt to meat, any kind, before cooking, it absorbs outside moisture
including thereat inside juices of your meat
which in fact toughens the resulting end product.
This is so if cooking medium is: grilling, broiling, roasting or frying.
But if you’re stewing, saucing or souping, then add your salt as you wish.
Believe you me.
Also, in view of the cooking medium used,
I coined the word BROAST which is
a portmanteau of the words broil & roast.